Sunday, June 29, 2008

Stone Masonry - Rock on!

Working with stone to build a 2'-0" high perimeter knee wall was what you might call a strengthening experience.  Gneiss from a local quarry (+/- 5 miles away) was hand picked by Mark, Julia and Jammin' and delivered to our site a few days before the 'walling' began.  Some big, some small, some unbelievably heavy....

Our walls are dry stacked stone walls, meaning no mortar was used in the process.  
We spent a lot of time shaping our stones with mallets and chisels to fit snugly against each other for stability and, more importantly, aesthetics.  Cornerstones were the most critical in the design of the wall, as they most have two good faces, and set the tone for the rest of the wall. 
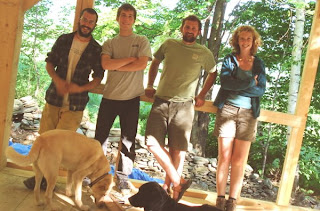
Ta Daaaa!

Monday, June 23, 2008

Breaker Breaker

Power up.
Time to bring in the electrical service and provide the barn with lights, smoke detectors, and GFI outlets.  We all got our hands in the breaker box, connected up our 3 way switches, and finally got energized.

20 Pennies and Rough Cut Lumber

After gaining some basic carpentry skills in the previous week, we started to put together our exterior wall system assemblies in preparation for our natural wall systems.  Our north and south walls will be a 14" double stud wall with a woodchip/clay insulation mixture within the stud wall cavity.   Our east and west walls will be strawbale.  
So, using rough cut 2x material we framed up our walls, and framed out our doors and windows.

Monday, June 9, 2008

It's Hammer-time!


Time to get some basic carpentry skills mastered and get some flooring in, so we can walk around in our beautiful timberframe barn.  (Like the cheesy photo-op?)

We started the week by framing out our first story floor system.  Oversized 2x12 rough-sawn floor joists with loose underside decking in between will give us plenty of space for blown-in cellulose insulation, creating a super-insulated floor system, sitting about 2'-0" above grade.  

Nico and Ben.......men at work!  Nico is toe-nailing the floor joist into the base of the timber-frame.  The area that Ben is standing in will be floor-less, as it will be a tractor bay for Knoll Farm.

Ahhhh, finally, a floor we can walk on.  The floor is made up of 
rough-sawn 2x8 planks nailed right into our floor joists.  Some may say it looks rough, however, it sure does have the beautiful aesthetic of an authentic barn. 


Sunday, June 1, 2008

Get Framed!

         
Cross-cut saws, chisels, boring machines, and mallets were the tools at hand this week as we learned how to lay out our frame and cut joinery for our timber frame structure. 

Check out this beautiful tenon
      

The first bent of our frame, up and braced.


After cutting out all the joinery for our frame, each bent is assembled on the ground and then tilted up into its correct position onto the sill plate.  The joinery for all of our posts, beams and knee braces is mortise and tenon with pegs made from an ash tree.  The posts are toe-nailed into the sill plate with timber-lock screws.  
We put all of the first floor structure up on Friday afternoon, and celebrated with a group photo, followed by group beers!
    
Saturday morning, the crane showed up at the site, and with his help, we were able to place the ridge beam (with scarf joint) and rafters into place.  I think we were all a little surprised and excited to be putting this large frame together so successfully.  
How special to put together such a  beautiful structure, with a relationship to our frame from start to finish.